June Update for Lightroom Classic, Lightroom, and Camera Raw
Adobe has just released new features, bug fixes, new camera support, and new lens profiles. Let’s take a closer look at what to expect in this update.
New to Lightroom Classic and Lightroom desktop
There are a few features that have been added to both of these programs (and Camera Raw too), so let’s address those first.
Super Resolution
While not a feature I use every day, I am pleased to see that Super Resolution has been added to both Lightroom products on the Mac and Windows platforms. It works the same as it does in Camera Raw when it was released back in March, except that now we can access it right inside of either Lightroom Classic or Lightroom (desktop only, not mobile). To use the new Enhance Super Resolution feature, just right-click the photo and choose Enhance (or use Photo > Enhance). When the Enhance Preview dialog appears, check the box for Super Resolution, then click the Enhance button to initiate the process of creating the larger copy.
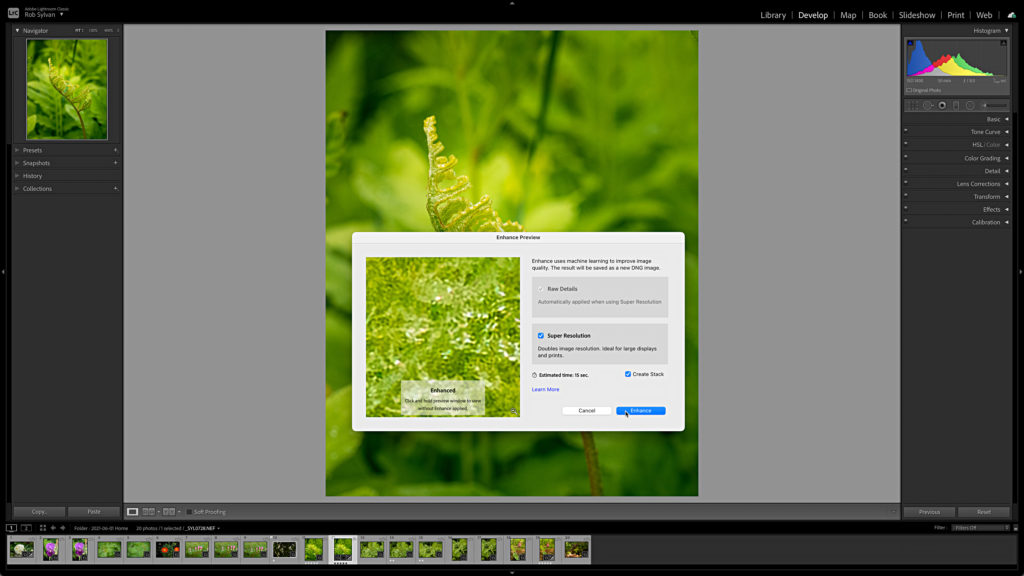
One small difference in the Lightroom Classic version of this feature is the Create Stack checkbox, which stacks the enhanced version with the original.
Native Support for Apple Silicon
With this update, Lightroom Classic joins Lightroom and Photoshop in being able to run natively on Apple computers with the new M1 chip. Note, there is a slight caveat when it comes to the tethering function on an Apple Silicon device, which I’ll cover shortly.
New Preset Packs
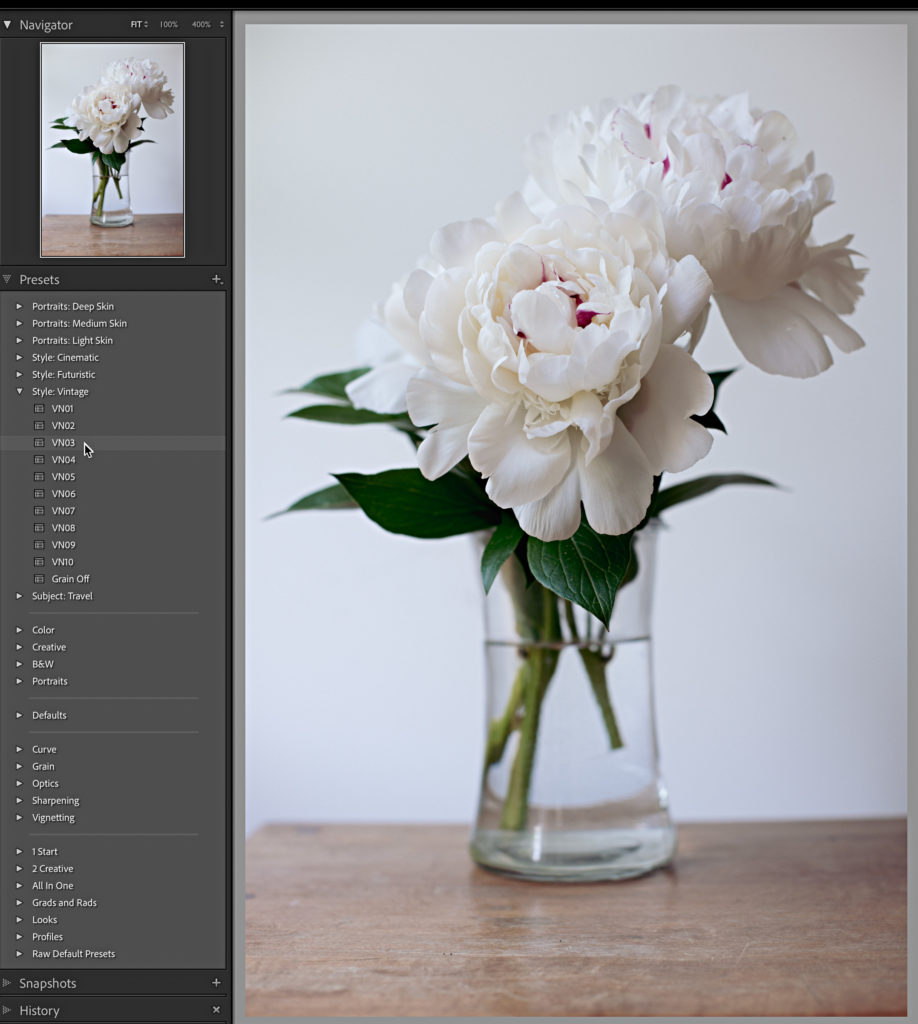
This release has added 7 new groups of premium presets covering a variety of skin tones, styles, and travel. Adobe says that more of these premium presets will be added over time. What makes them premium is that they are only available to owners of paid subscription plans, as one more incentive to people using the free mobile apps to upgrade. These presets do seem to have been given a lot of thought by their creators and are worth exploring.
New to Lightroom Classic Only
There are a few additional performance improvements, such as faster metadata management in the Metadata panel when working on multiple photos, an update to how Lightroom Classic handles video files, and improved VRAM utilization.
Nikon Tethering Live View
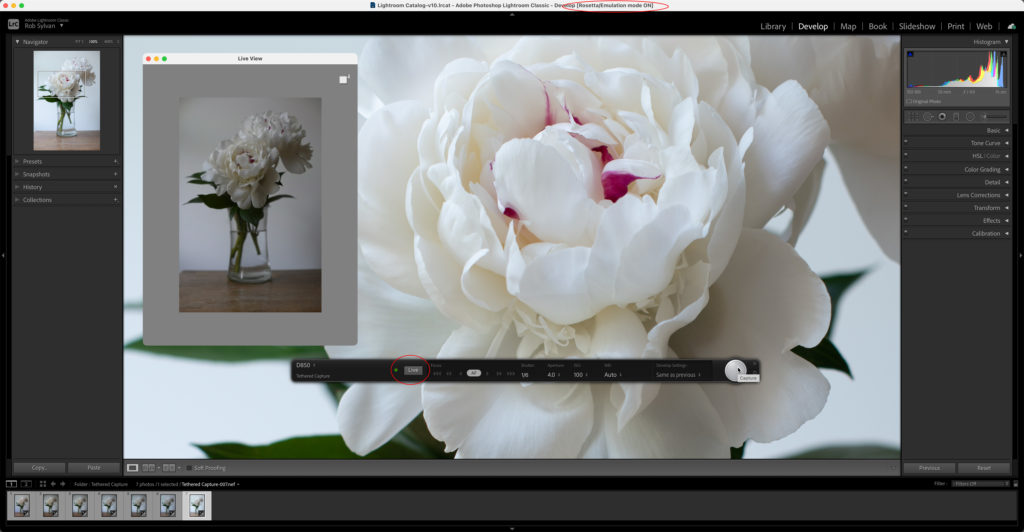
For supported Nikon cameras, we now have the ability (well, the feature was previously a beta release) to enable Live View within the Lightroom Classic Tether Bar and get a real time view of what we are shooting. Once the tether capture has been established, click the Live button on the Tether bar to begin. Note, for my D850 I also needed to press the LV button on the back of the camera to allow for the camera’s shutter button to be used for taking the photo.
Tethering on Apple Silicon Devices
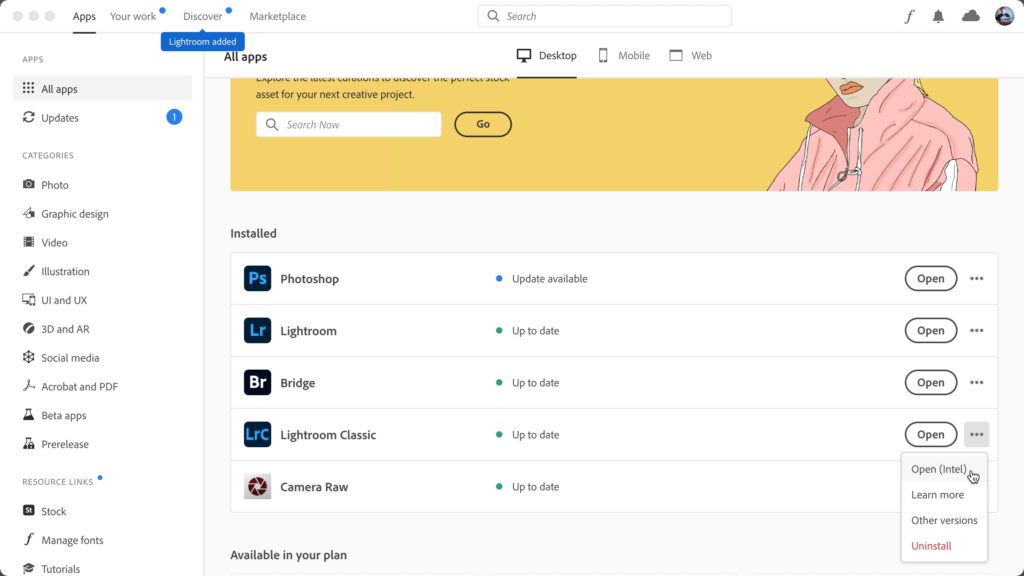
I mentioned the caveat to Apple Silicon support, and here it is, to tether you’ll need to run in Rosetta Emulation mode. By default, on an Apple Silicon device you’ll be running in native mode, which in my experience has been great so far. However, if you try to start a tethering session in this mode you’ll be prompted to relaunch in Rosetta.
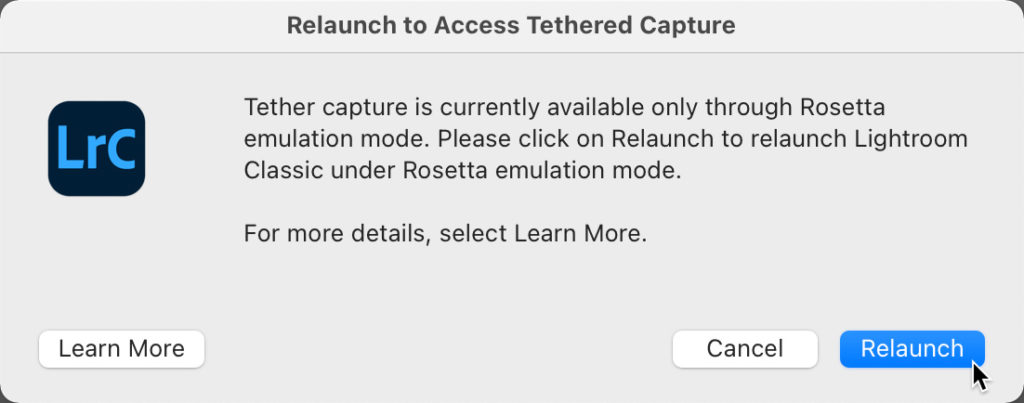
Clicking Relaunch will exit you out of Lightroom Classic and then relaunch (be patient) in Rosetta. Once re-opened, you will have to go start the tethering process from the start (it doesn’t relaunch into tethering), and away you go (see first tethering figure above). Once your tethering session is complete, just exit Lightroom Classic, and the next time you launch it will default back to running natively.
If you know you are going to be shooting tethered, you can launch Lightroom Classic into the Intel version from the Creative Cloud Application Manager directly into Rosetta mode, and then just get on with tethering.
New to Lightroom Only
Switching to the cloud-based Lightroom family of apps, there are a few additional features to note.
Collaborative Editing
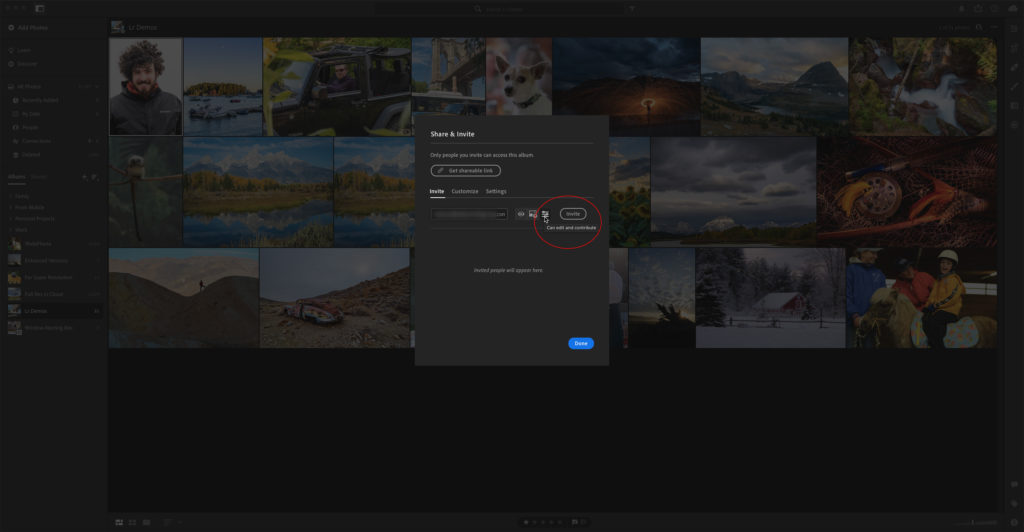
We’ve long had the ability to share albums with others, and we even gained the ability to allow other people to contribute photos to your shared album. The latest iteration on this functionality is to allow other people to edit the photos in the shared album. You enable this in the same manner of sharing an album from before, except you’ll see a new privilege added to the Share & Invite screen. Enter the person’s email address, then select the third icon and click Invite to send the email invitation to them.
As the owner of the shared album, you can of course remove their access or change it to just being able to view or contribute after the fact.
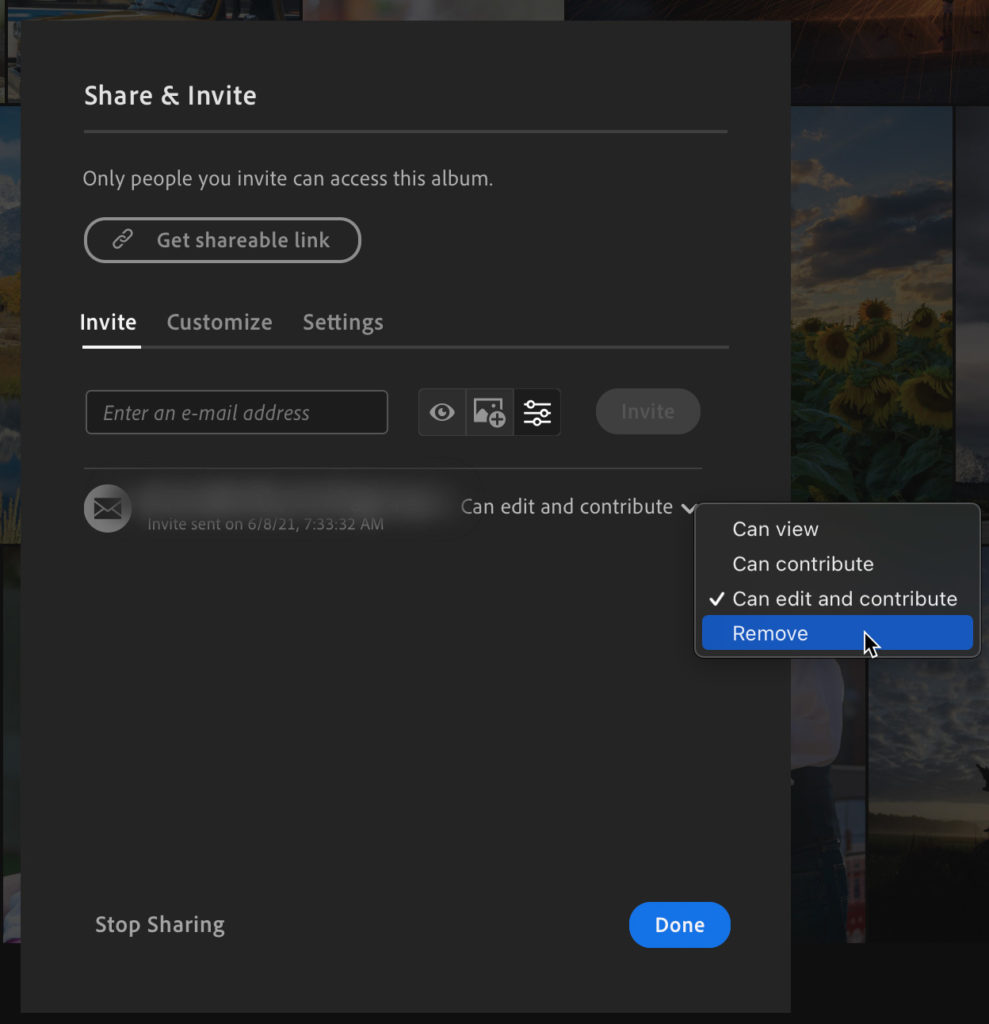
This could be very useful to anyone collaborating on a project or even among family members. Edits are tracked in the Versions panel under Auto.
Custom Crop Ratios
This seems like one of those things that should have been in here all along, but well, its here now. This makes it possible to create and save up to 5 custom aspect ratios that are different from the ones already included. Just like in Lightroom Classic, the oldest custom aspect ratio is pushed off the list when a sixth one is created.
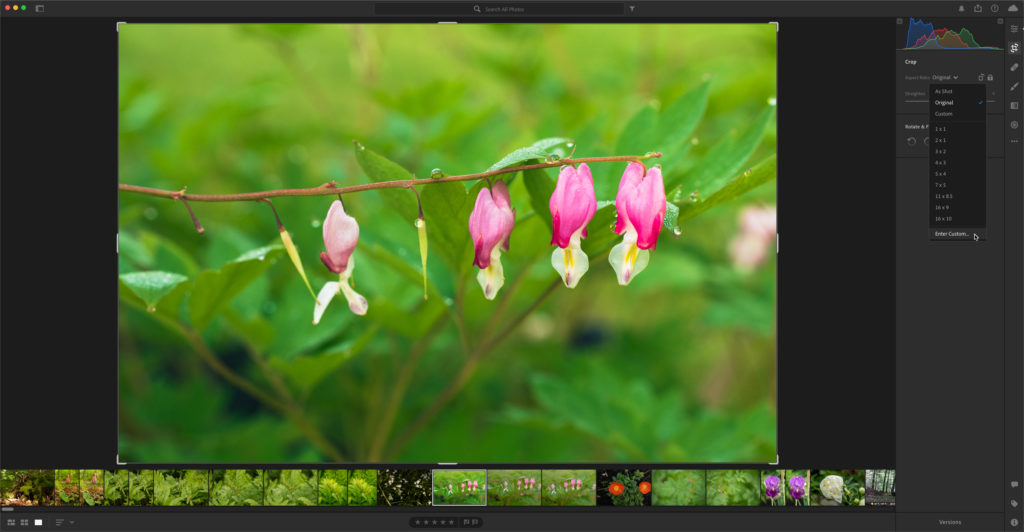
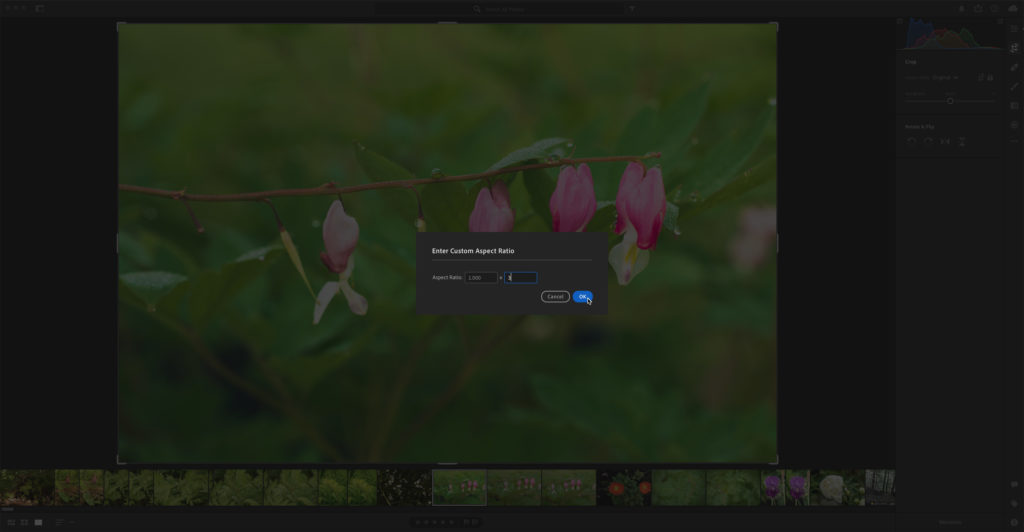
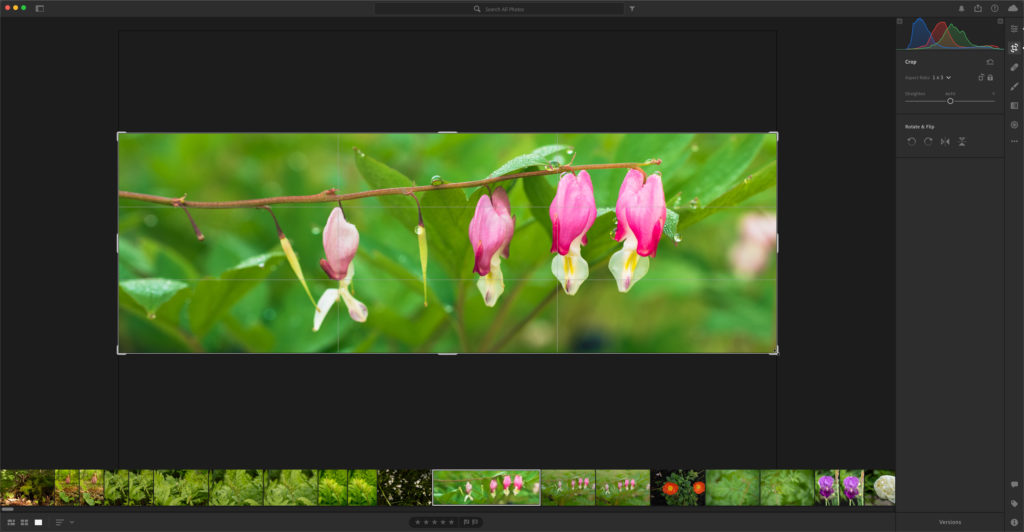
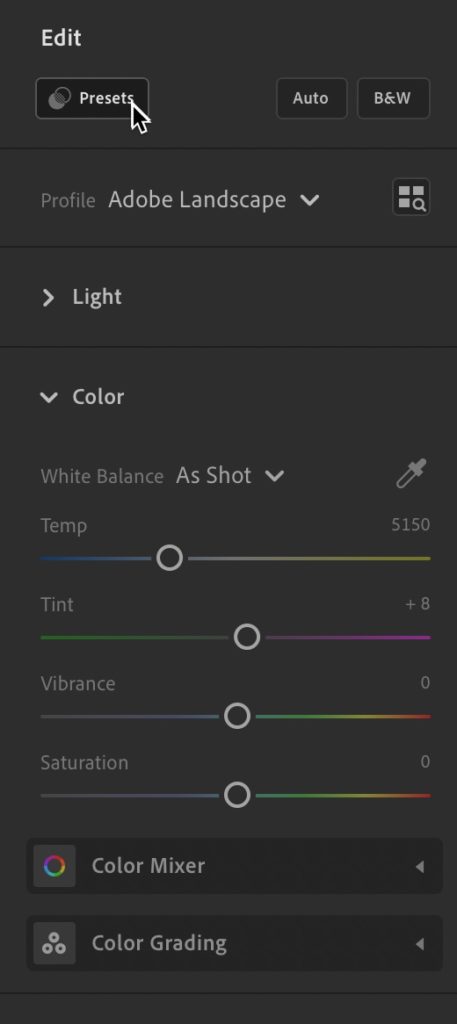
Side note, in Lightroom on Mac/Win the location of the Presets button has moved up to the top of the Edit panels, right above the Profile drop-down menu. Once clicked, the preset panel appears in the same location as before.
Color Grading Support in Learn
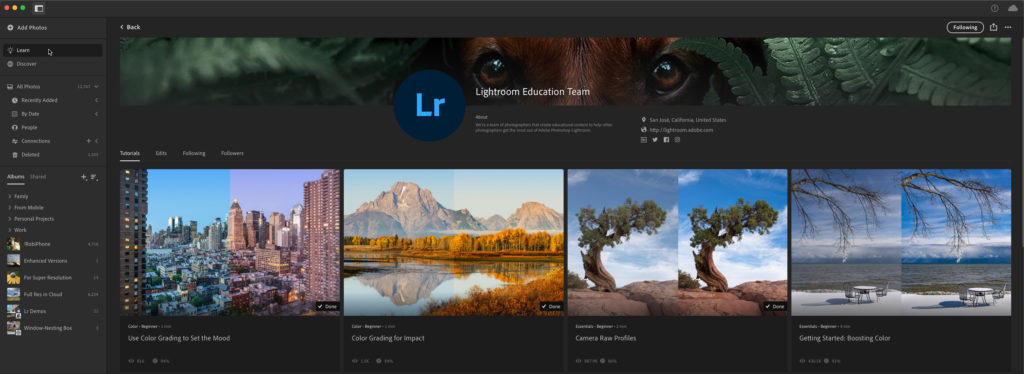
I’ve written about the Learn and Discover sections of Lightroom in the past, and I want to mention that Color Grading is now supported in those tutorials. I’m especially honored that I was able to collaborate with the Lightroom Education Team to create some of these tutorials (thanks, Katrin). Go check them out!
All of these apps also gained new camera support and new lens profiles, which is always welcome news to those with new cameras and lenses. Enjoy!
The post June Update for Lightroom Classic, Lightroom, and Camera Raw appeared first on Lightroom Killer Tips.
By accepting you will be accessing a service provided by a third-party external to https://casite-257362.cloudaccess.net/